Editor Interface
Immediately after you stop the recording, the CANVID Editor opens. From here, you can customize your screen recording using tools and features that let you personalize the look and feel of your video.
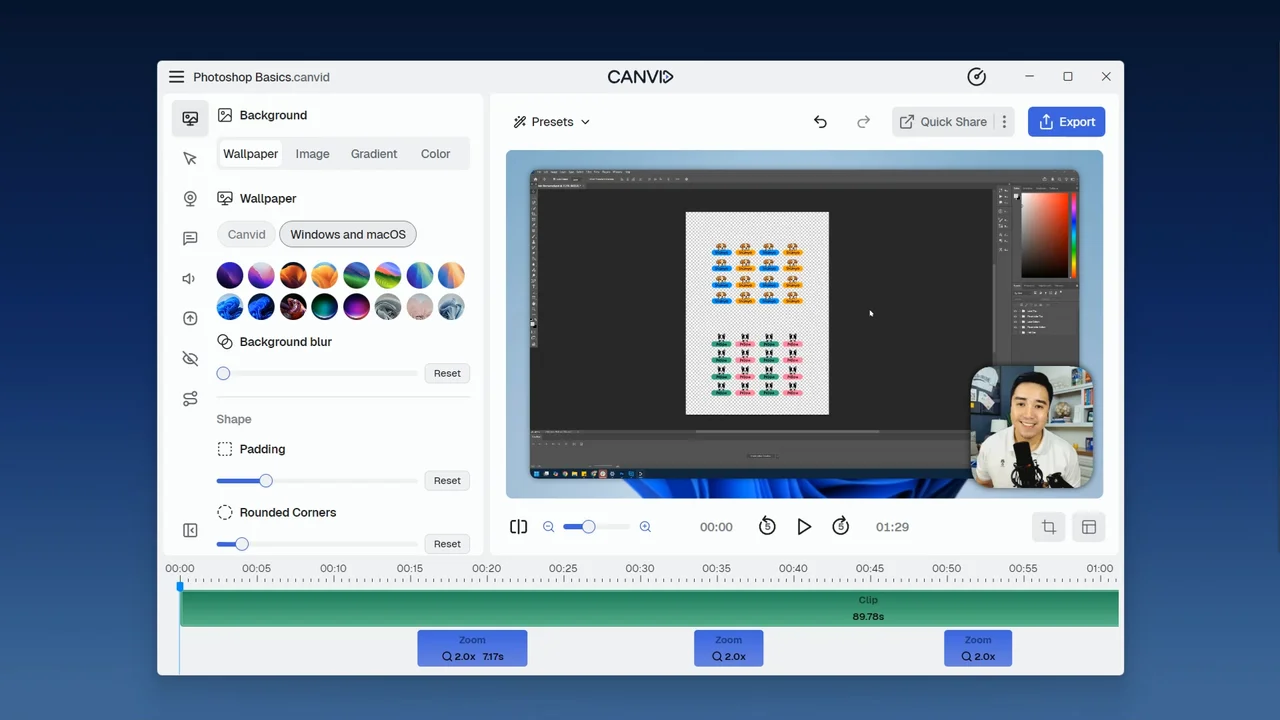
Preview Screen & Playback
This provides a real-time preview of your video, allowing you to see how your edits and adjustments will appear in the final output as you work.
Use the playback controls below to play through your video and the timeline, allowing you to review the changes you’ve made.
Cropping
Use the Crop tool to remove unwanted areas from your screen recording. Click the Crop button to open the cropping dialog box, then click and drag the edges of the frame to adjust the visible area to your preference.
Aspect Ratio
The option to change your recording’s aspect ratio is available to anyone who wants the flexibility to show their video to fit different platforms and devices.
- Click the aspect ratio button (next to the Crop button) and select your preferred ratio.
- By default, the app adapts the aspect ratio based on your screen recording’s resolution.
Timeline & Controls
- The timeline displays the video track (in green) and zooms (in blue).
- The app automatically adds zoom effects based on cursor movement and clicks.
- Navigate the timeline by dragging the horizontal scrollbar or using your mouse scroll wheel.
Trimming & Deleting
Use the Split button (or press the S key) to divide the video track into separate segments, making it easier to trim unwanted parts.
- Click a timestamp on the timeline, then select the cut tool.
- Undo cuts by right-clicking and choosing “Undo Cut Markers”
- Removed sections appear faded in the timeline.
Zooms
Zooms appear as blue bars just below the video track. By default, they’re automatically placed on the timeline based on where your mouse clicks and movements occurred during recording.
You can fully customize these zooms, including adding new ones, adjusting existing ones, or removing them altogether.
Editor Sidebar
The editor’s left sidebar provides access to various controls and AI tools for enhancing videos into high-quality, studio-grade screen recordings.
Start Recording
Start your CANVID recording instantly by clicking the red Record button after setup. Fast and hassle-free.
Camera Zoom Setting
Control how your webcam behaves during zoom in CANVID. Learn how to keep your camera visible, shrink it, or hide it for cleaner, more professional screen recordings.