Understanding Presets in CANVID: Save Time and Ensure Consistency
What Are Presets in CANVID?
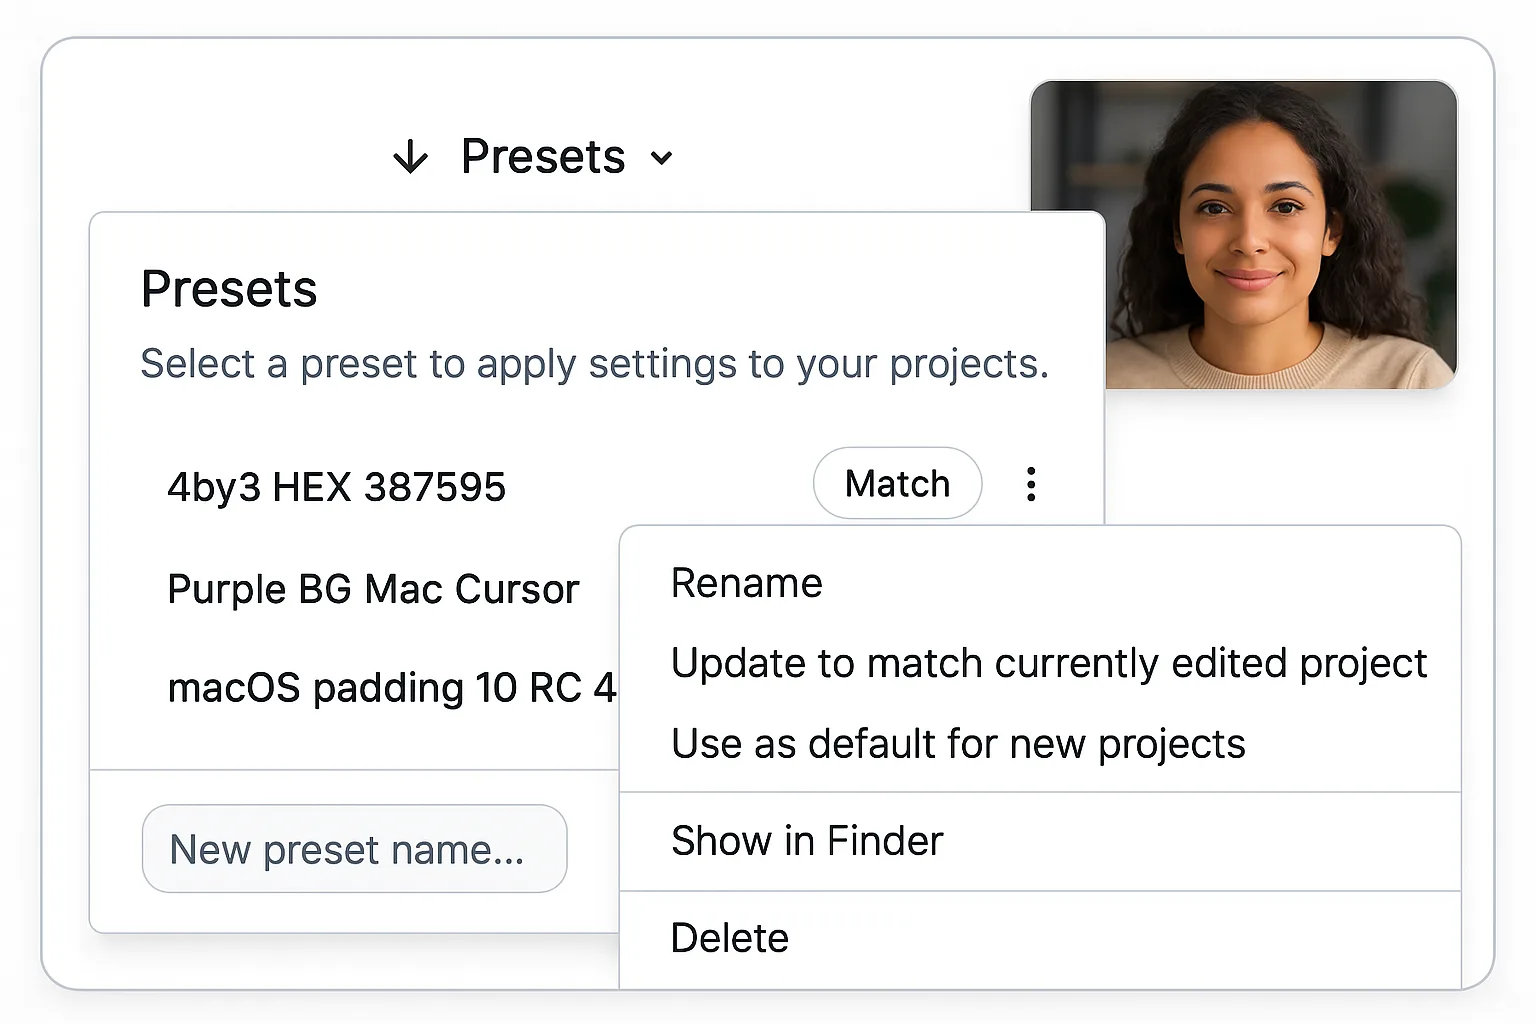
In the app, presets are predefined templates that store a set of video editing configurations. They allow you to apply consistent styles and settings across your projects, saving time and maintaining uniformity. Instead of manually adjusting settings for each new project, you can apply a preset to ensure all your videos have the same look and feel.
Why Use Presets?
Utilizing presets in CANVID offers several advantages:
- Efficiency: Quickly apply your preferred settings without repetitive adjustments.
- Consistency: Maintain a cohesive style across all your video content.
- Customization: Tailor presets to suit different video types, such as tutorials, promotional content, or social media posts.
How to Create and Apply Presets
Creating and applying presets is straightforward:
- Customize Your Settings: Adjust your video project settings to your desired configuration.
- Save as Preset: Save these settings as a new preset within the app.
- Apply Preset to New Projects: When starting a new project, select your saved preset to instantly apply all the predefined settings.
This process streamlines your workflow and ensures consistency across all your video projects.
What Settings Are Included in a Preset?
A CANVID preset can encompass various settings, including:
- Backgrounds: Options for custom backgrounds, including solid colors, gradients, or images.
- Aspect Ratio: Customizable aspect ratios to match different platforms' requirements.
- Camera Customization: Adjustments to webcam settings, including position and background.
- Cursor Customization: Settings for cursor appearance and behavior during recordings.
- Audio Capture: Preferences for microphone and system audio recording.
By saving these configurations in a preset, you can ensure that each new project adheres to your established preferences.
Saved Settings in a Real Preset (JSON Breakdown)
These are real values taken from a preset schema file. Using JSON-based presets helps creators standardize their video styling across multiple recordings.
| Setting Category | Setting Name | Value / Description |
|---|---|---|
| Playback | Padding | 15 |
| Playback | Corner Radius | 20 |
| Playback | Shadow | Enabled, Color: #000000, Opacity: 0.8, Offset: 3, Blur: 6 |
| Background | Type | Gradient |
| Background | Primary Color | #94b8ff |
| Background | Gradient Colors | #ffcf73, #ff7a2f |
| Background | Blur | 0 |
| Webcam | Position | Bottom Right |
| Webcam | Hidden | false |
| Webcam | Mirror | false |
| Webcam | Offset | 30 |
| Webcam | Radius | 35 |
| Webcam | Scale | 0.4 |
| Webcam | Zoomed Scale | 0.75 |
| Webcam | Shadow | Enabled, Color: #000000, Opacity: 0.5, Offset: 3, Blur: 6 |
| Cursor | Visible | true |
| Cursor | Scale | 3 |
| Cursor | Type | pointer |
| Cursor | Smooth Movement | true |
| Cursor | Hide While Stationary | false |
| Cursor | Reset at Video End | false |
| Cursor | Easing | 1, 107.64, 30.96, 0 |
| Zoom & Easing | Default Zoom Scale | 2 |
| Zoom & Easing | Always Keep Zoomed In | false |
| Zoom & Easing | Zoom In Easing | 1, 210, 20, 0 |
| Zoom & Easing | Zoom Out Easing | 1, 210, 20, 0 |
| Zoom & Easing | Follow Easing | 1, 280, 120, 0 |
| Audio | Microphone Recording | true |
| Audio | System Audio Recording | true |
| Subtitles | Show Subtitles | false |
| Subtitles | Word Highlighting | true |
| Subtitles | Subtitle Scale | 1 |
| Aspect Ratio | Aspect Ratio | auto |
This preset configuration was exported from a real schema file.
Final Thoughts
CANVID presets make my video editing faster and more consistent. I use them every day and they've saved me a ton of time by eliminating repetitive setup tasks. Instead of adjusting settings from scratch, I just load a preset and voila, the work is done! Whether I'm making tutorials, promo videos, or social media content, presets help me keep everything looking clean and professional across all my projects.